ヒンジとトルク
ヒンジの使い方とトルクについて検証してみました。
メモ書きです。
メモ書きです。

 test_hinge_torque.zip
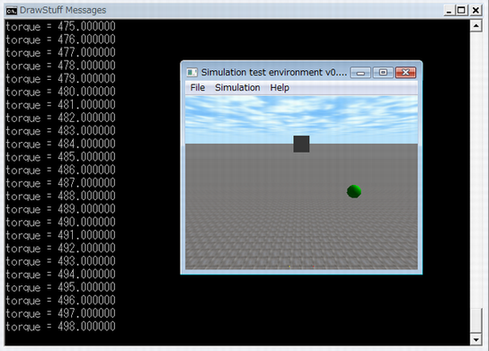
"a"キー:押すとトルクが加算(+1)されます。
"d"キー:押すとトルクが減算(-1)されます。
"d"キー:押すとトルクが減算(-1)されます。
ヒンジの使い方
dBodyID body1, body2;
dJointID joint_hinge;
- ヒンジの生成
joint_hinge = dJointCreateHinge( world, 0 );
- body1とbody2をヒンジで接続
dJointAttach( joint_hinge, body1, body2 );
- ヒンジのアンカー位置を設定
dJointSetHingeAnchor( joint_hinge, 0.0, 0.0, 10.0 ); // アンカー位置をz=10に設定
- ヒンジの軸方向を設定
dJointSetHingeAxis( joint_hinge, 0.0, 1.0, 0.0 ); // 軸をy方向に設定
サンプルコード
#ifdef WIN32
#include <windows.h>
#endif

#include <ode/ode.h>
#include <drawstuff/drawstuff.h>

#ifdef dDOUBLE
  #define dsDrawBox dsDrawBoxD
  #define dsDrawSphere dsDrawSphereD
#endif

static dWorldID world;
static dBodyID body_box;
static dBodyID body_ball;
dReal box_size[3] = { 1.0, 1.0, 1.0 };
dReal ball_radius = 0.5;
dJointID joint_hinge;

#define STEP_SIZE 0.01
double time = 0;

double torque = 0.0;


// start simulation - set viewpoint
static void start()
{
    static float xyz[3] = { 0.f, -10.f, 10.f };
    static float hpr[3] = { 90.f, -15.f, 0.f };

    dsSetViewpoint( xyz, hpr );

    printf( "init torque = %f\n", torque );
}

// called when a key pressed
static void command (int cmd)
{
    if (cmd == 'a') {
        torque += 1.0;
        printf( "torque = %f\n", torque );
    }
    else if (cmd == 'd') {
        torque -= 1.0;
        printf( "torque = %f\n", torque );
    }
}

// simulation loop
static void simLoop( int pause )
{
    // Ctl+p が押されたらifに入らない
    if (!pause)
    {
        dJointAddHingeTorque( joint_hinge, torque );

        dWorldStep( world, STEP_SIZE );
        time += STEP_SIZE;
    }

    dsSetColor( 1.0f, 1.0f, 1.0f );
    dsDrawBox( dBodyGetPosition( body_box ), dBodyGetRotation( body_box ), box_size );

    dsSetColor( 0.0f, 1.0f, 0.0f );
    dsDrawSphere( dBodyGetPosition( body_ball ), dBodyGetRotation( body_ball ), ball_radius );

}


int main( int argc, char* argv[] )
{
    dInitODE();

    // setup pointers to drawstuff callback functions
    dsFunctions fn;
    fn.version = DS_VERSION;
    fn.start   = &start;
    fn.step    = &simLoop;
    fn.command = &command;
    fn.stop    = 0;
    fn.path_to_textures = "../drawstuff/textures";

    world = dWorldCreate();
    dWorldSetGravity( world, 0.0, 0.0, -9.8 );


    // box creating
    {
        body_box = dBodyCreate( world );
        dReal pos[3] = { 0.0, 0.0, 10.0 };
        dBodySetPosition( body_box, pos[0], pos[1], pos[2] );
    }

    // ball creating
    {
        body_ball = dBodyCreate( world );
        dReal pos[3] = { 0.0, 0.0, 5.0 };
        //dReal pos[3] = { 5.0, 0.0, 10.0 };
        dBodySetPosition( body_ball, pos[0], pos[1], pos[2] );

        dMass m;
        dMassSetSphereTotal( &m, 10.0, ball_radius ); // 10kg
        dBodySetMass( body_ball, &m );
    }

    // boxの固定
    {
        dJointID fixed;
        fixed = dJointCreateFixed( world, 0 );
        dJointAttach( fixed, NULL, body_box );
        dJointSetFixed( fixed );
    }

    // ヒンジジョイント
    {
        joint_hinge = dJointCreateHinge( world, 0 );
        dJointAttach( joint_hinge, body_box, body_ball );
        dJointSetHingeAnchor( joint_hinge, 0.0, 0.0, 10.0 ); // boxと同じ座標
        dJointSetHingeAxis( joint_hinge, 0.0, 1.0, 0.0 );

        //// ヒンジジョイントのフィードバック情報のための設定
        //dJointFeedback *fb = new dJointFeedback;
        //dJointSetFeedback( joint_hinge, fb );
    }

    //torque += 490.0;

    dsSimulationLoop( argc, argv, 320, 240, &fn );

    dWorldDestroy( world );
    dCloseODE();
    return 0;
}
トルク検証
ボールが水平状態で静止している状態にするためのトルクはいくら必要か?
ボールの位置を次に変更します。
ボールの位置を次に変更します。
       body_ball = dBodyCreate( world );
       dReal pos[3] = { 5.0, 0.0, 10.0 };  // 支点と水平位置を初期位置
このとき、支点との距離はx=5.0mとなります。
またボールの質量は10.0kgに設定します。
このとき、ボールを静止させるために必要なトルクはいくらになるか考えます。
またボールの質量は10.0kgに設定します。
このとき、ボールを静止させるために必要なトルクはいくらになるか考えます。
トルクの単位は「N・m」です。
Nはニュートンなので加速度x質量。
よって、重力加速度g=9.8とすれば
静止に必要なトルクT = 9.8 x 10.0 x 5.0 = 490.0 [N・m]
Nはニュートンなので加速度x質量。
よって、重力加速度g=9.8とすれば
静止に必要なトルクT = 9.8 x 10.0 x 5.0 = 490.0 [N・m]
検証してみました。
dJointAddHingeTorque( joint_hinge, torque ); // torque = 490.0;
torque=490と設定することで静止することを確認しました。
この数値より小さくなると下がりますし、大きくなると上がります。
この数値より小さくなると下がりますし、大きくなると上がります。
まとめ
あんまり物理は得意じゃないですけど、トルクのことがなんとなくわかりました。
ODEのヒンジの使い方としてわかったことは、
- ヒンジの位置の設定、軸の設定
- ヒンジへのトルクの与え方(シミュレーションステップ毎にAddHingeTorqueが必要)
